Finished product:
WHAT YOU'LL NEED:
1. Corks. Now these aren't normal wine corks. I used Craft Designer Cork Collection from Jo-Ann that had multi- sized corks (found in the craft isle) and Darice Cork Collection 30 pc that also had multi- sized corks from Michael's.
2. Shadow Box. If you go now, Michael's is offering 40% off their entire stock! I personally got mine at Jo-Ann. I made sure that the tallest corks would just slightly be sticking out of the shadow box. I stuck with a black frame to match my DIY Dry Erase Calendar.
3. Hot glue gun.
STEP I
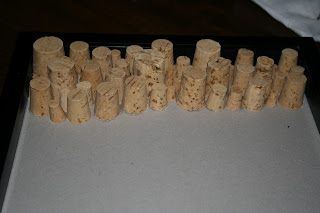
Open all of your cork bags and lay out the corks. I found it was helpful to have them not separated into size so that the board didn't look like one big reoccurring pattern.
STEP II
Start gluing! Like I said, it'll look better if the board isn't a pattern so try not to think about the sizes so much as where things fit in between others.
*Note- don't use all of your little ones right away; ration them. You'll find that as you complete more of the board you'll want more little corks! Also keep in mind that even though you only have a few very large corks you'll want to separate them evenly among the board so that you're eye isn't drawn to one particular section.
As you can see, there are blank spaces in between the corks. From far away you can't tell that those exist but obviously up close you can. I'm thinking about adding glitter in between the corks or something along those lines but you can do whatever you want!
Technically this shadow box has the ability to hang on the wall but I personally think it will serve a greater purpose resting upright on my desk!


No comments:
Post a Comment