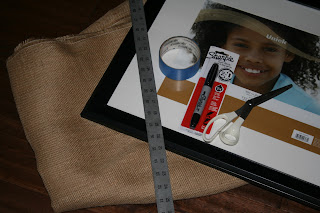
WHAT YOU'LL NEED:
1. Picture frame. This frame is very lightweight because I'll be hanging it without nails in my dorm. Keep in mind that this will act as your calendar so the largeness of the frame will depend on how many activities you'll be keeping track of each month.
2. Burlap. I chose a tightly woven burlap and got enough so that I could double it behind the glass but the how you want it to look is up to you.
3. A long ruler. You'll use this to make your calendar grid.
4. Strong tape, a Sharpie, and scissors.
STEP I
Cut your burlap so that it will fit into your frame. Also choose if you want your calendar to be vertical or horizontal (if your frame is rectangular).
Tape the burlap down on a flat surface so that it is easier to make the grid. Try to pull it tight when taping it. STEP III (pencil optional)
I started this in pencil because I know that I'm prone to messing up but if you're confident enough in your grid abilities go ahead and just do it in Sharpie!
Measure out your grid. You'll need seven boxes across and five down and obviously they should be evenly sized. I left about an inch on either side and the bottom so that it wouldn't be completely hitting the frame and a little more on the top so that I could have room to write the month or various notes.
STEP IV
If you skipped the pencil and went straight to Sharpie, disregard this step.
Using the ruler again, create your calendar outline in Sharpie. I just used a regular Sharpie for the outline but a thin one could look really nice, also. STEP V
From here it's really up to you. I personally didn't write the days on the burlap only because I was afraid my writing wouldn't look nice enough. You can also make a Sharpie box on the top for the month or do whatever else you think would look nice.
Put it in the frame and voila! You've got yourself a cute calendar!


No comments:
Post a Comment